Moving Day Checklist: What to Do From Morning Through Final Walkthrough
Use this moving day checklist to organize the day from the first morning tasks through loading, departure, unloading, paperwork, and the final walkthrough of your old home.

Moving day is easier to manage when the day is treated as a sequence of handoffs: prepare the home, confirm the plan, supervise loading, close the old property, travel, receive the shipment, and document the finish. This checklist organizes those handoffs from the first hour of the morning through the final walkthrough. It applies to professional, hybrid, and do-it-yourself moves, with notes where the process differs.
For a broader explanation of preparing for loading, managing the work, and handling the first steps after arrival, see the complete moving day guide. Use that guide for background and this checklist as the chronological sequence to follow during the day.
The suggested order is a MuvvKit planning framework, not a universal rule. Your mover agreement, rental contract, lease, closing documents, building policies, local requirements, and the needs of your household control when they differ from this guide.
Moving Day at a Glance
Use the timeline as a control sheet rather than a rigid clock. Arrival windows, elevator reservations, travel time, weather, and the size of the move may shift the schedule.
| Stage | Main checks |
| Before the crew arrives | Dress for the work; charge phones; eat; secure children and pets; separate essentials, valuables, documents, medicines, and prohibited items; clear paths; photograph the property and high-value belongings. |
| At arrival | Confirm identities, scope, addresses, access details, paperwork, payment terms, and the person authorized to approve changes. |
| During loading | Keep essentials out of the shipment; direct room priorities; monitor walkways; record changes; check closets, cabinets, storage areas, and outdoor spaces as rooms empty. |
| Before leaving | Complete a room-by-room sweep; document condition; confirm utilities and keys; close windows and doors; follow the lease, sale, or handover instructions. |
| At the new home | Confirm access and room labels; protect paths; direct placement; compare delivered items with the inventory; note visible loss or damage before signing when the form allows. |
| At closeout | Review documents and charges; retain copies; photograph concerns; secure the home; locate essentials; record follow-up items for the next day. |
Keep the Day’s Details in One Place
MuvvKit Moving Day Command Sheets provide printable pages for contacts, timing, room directions, final checks, and other information that needs to remain accessible during the move.
View the Moving Day Command SheetsBefore the Movers or Helpers Arrive
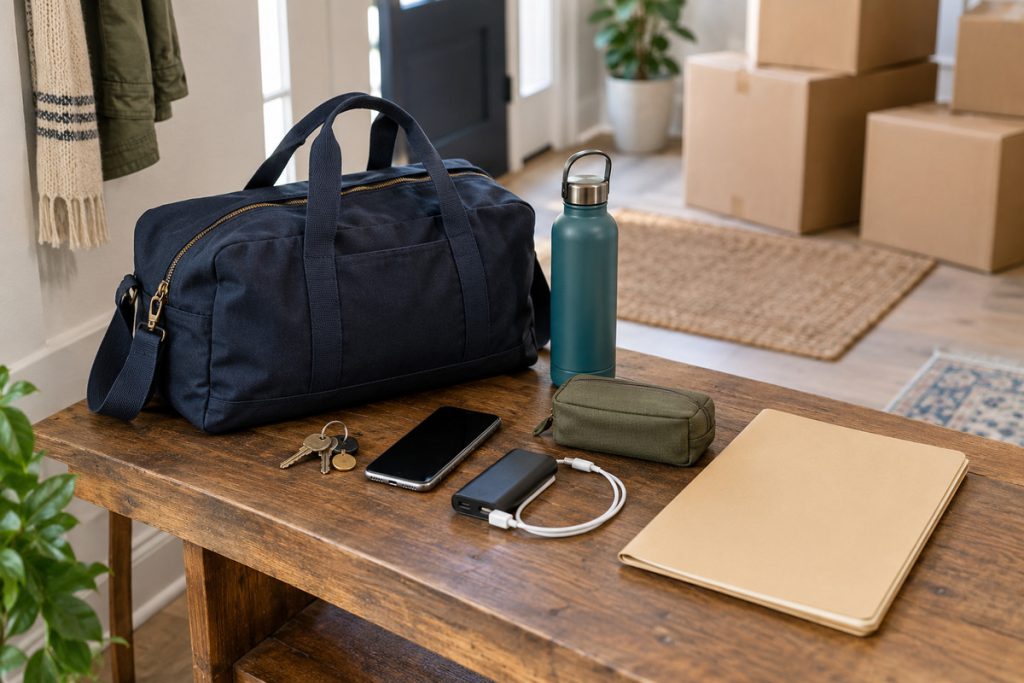
Start with the people and items that should never enter the loading flow. A clearly separated no-load zone prevents medicines, keys, identification, chargers, work devices, travel bags, and first-night supplies from disappearing behind other boxes.
If your move is still several days away, complete the tasks in this week-before-moving checklist before beginning the day-of sequence.
Place the records needed to authorize, verify, pay for, and complete the move in one protected working file. Review the complete list of moving day documents to keep within reach before loading begins.
Get Yourself Ready First
- Wake early enough to eat, dress, and address last-minute tasks before the arrival window begins.
- Wear closed-toe shoes and clothing that allows safe movement. Keep water and simple food available without blocking work areas.
- Fully charge phones and portable power banks. Save the mover, truck rental, building contact, property manager, and household contact numbers where they are easy to reach.
- Check the weather and travel route. Adjust floor protection, hydration, parking, or timing if conditions require it.
Protect Children and Pets From the Work Zone
Arrange supervision away from open doors, moving equipment, stacked boxes, and vehicle traffic when possible. If children or pets remain at the property, designate a closed room or another controlled area and tell every helper that it is occupied. Keep identification, leashes, carriers, food, medicine, and comfort items with the household rather than on the truck.
Build a No Load Zone
- Wallets, identification, keys, cash, jewelry, and irreplaceable records
- Prescriptions, medical devices, glasses, and mobility aids
- Phones, laptops, chargers, and portable batteries needed in transit
- Mover paperwork, lease or closing documents, truck-rental documents, and proof of insurance
- First-night bags, basic toiletries, towels, bedding, a change of clothes, and simple cleaning supplies
- Items the mover or rental agreement does not permit in the vehicle
Do not rely on a handwritten sign alone. Use a closed room, locked vehicle, or visibly separated area, and verbally identify it to the crew lead. For a more detailed separation plan, see the MuvvKit guide on what to pack in a first-night moving essentials kit.
The no-load zone should also hold the supplies your household will need before regular unpacking begins. Use this guide to decide what to pack in a first-night moving essentials kit, then keep that bag with you instead of placing it in the moving truck or shipment.
Prepare the Property
- Clear hallways, stairs, entries, and the route to the truck. Remove loose rugs, cords, low decorations, and other trip hazards.
- Reserve or confirm legal parking, elevator access, loading docks, gate codes, and building time limits.
- Place room labels where they can be seen from the doorway. Mark boxes consistently so the destination room is clear.
- Photograph walls, floors, doors, appliances, and any existing damage that could be relevant to the property handover.
- Photograph valuable or fragile items before they are moved, especially if their condition is not already documented.
Clear destination labels can reduce repeated questions during loading, and help boxes reach the correct rooms at the new home. The article on how to label moving boxes explains how to create a consistent system using room names, contents, handling notes, and unpacking priority.
When the Moving Crew Arrives
Meet the crew leads before loading begins. A short orientation reduces mid-move questions and gives both sides a common understanding of the property, shipment, and access constraints.
Confirm the Plan and Paperwork
- Confirm the company name, crew lead, truck identification, origin and destination addresses, contact numbers, and expected route or delivery window.
- Review the services included in the estimate or order for service. Ask how added packing, long carries, stairs, waiting time, storage, or other changes would be documented and priced before authorizing them.
- Read the bill of lading and related documents before signing. Keep your copy with you rather than packing it.
- Identify who may approve changes. Ask the crew to bring scope, price, or schedule questions to that person.
- Point out the no-load zone, fragile pieces, items that stay with the property, access restrictions, and any areas that are off limits.
For an interstate household-goods move, the Federal Motor Carrier Safety Administration says consumers should understand the contract terms and the documents they are asked to sign. FMCSA also requires interstate movers and brokers to provide the federal rights-and-responsibilities booklet before the move. Those federal protections concern interstate moves; local or intrastate moves may be governed by different state or local rules.
If you are still preparing for a professionally managed move, review the process for hiring professional movers. It explains what to examine before choosing a company and provides useful context for the documents and responsibilities that appear on moving day.
Make a Condition and Inventory Baseline
If the mover prepares an inventory, review item numbers and condition notations while the information is still easy to check. Raise unclear or inaccurate entries before loading is complete. Keep copies of inventories, photographs, estimates, receipts, and signed documents together. With a DIY move, use your own box count or loading list to create the same basic record.
While the Home Is Being Loaded
Your main role is coordination, not lifting alongside a professional crew unless invited and safe to do so. Stay available, keep decisions moving, and prevent household essentials from entering the shipment.
Supervise by Zones
- Keep one person near the loading activity or available to the crew lead.
- As each room empties, check closets, cabinets, shelves, wall hooks, attics, basements, balconies, garages, sheds, and outdoor areas.
- Mark the room as cleared only after the sweep. Do not depend on memory at the end of the day.
- Track items that are disassembled and keep hardware with the related item or in a clearly labeled parts container.
- Record any approved service change, delay, damaged area, or item withheld from the shipment.
Keep Access Safe and Usable
Do not allow boxes to narrow stairs, hide changes in floor level, block exits, or obstruct the crew’s route. Keep food, drinks, personal bags, and cleaning supplies outside the main path. If an unsafe condition develops, pause the flow long enough to correct it.
Manage the Last Items Deliberately
Items loaded last are usually easiest to reach first, but actual placement depends on weight, shape, securement, and the mover’s loading method. Ask rather than directing an arrangement that could make the load unstable. For a DIY truck, follow the vehicle provider’s loading and weight guidance and keep the load within the vehicle’s limits.
The Final Walkthrough at the Old Home
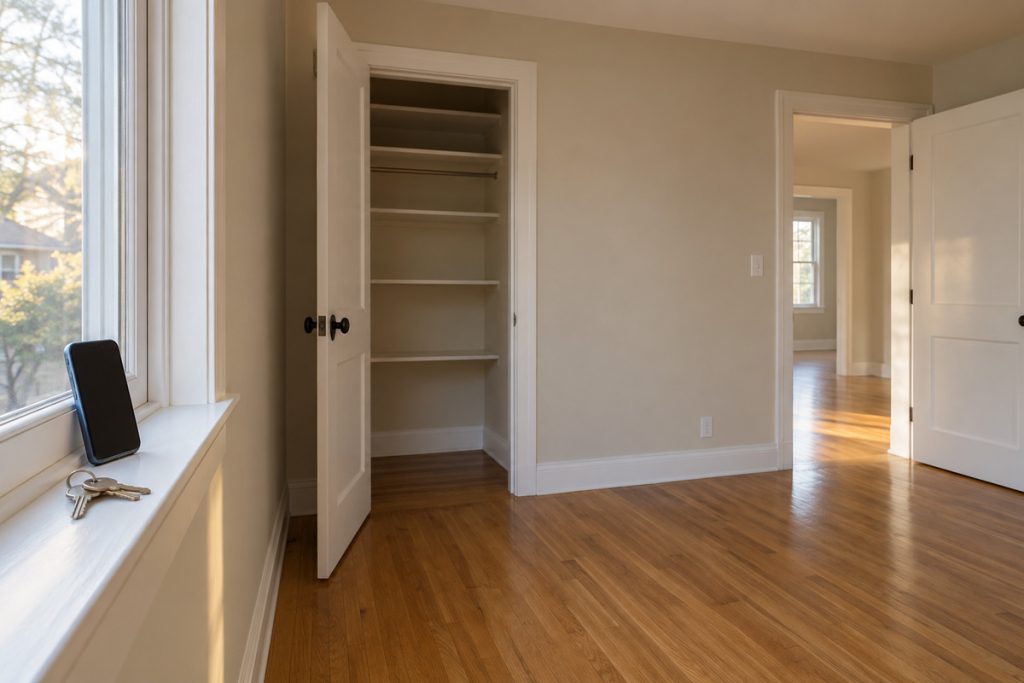
Do the final walkthrough only after the last planned item has left the building. One person should complete the sweep without carrying boxes at the same time. If the property has multiple levels or outbuildings, use a written route so no area is skipped.
After the final walkthrough and delivery handoff, continue with the first 24 hours in a new home to check essential systems, document conditions, set up occupied rooms, and prepare for the next morning.
Follow a Fixed Room-by-Room Route
- Look inside every closet, cabinet, drawer, appliance, medicine cabinet, and built-in storage space.
- Check behind doors, under stairs, on shelves, above cabinets, and near outlets where chargers may remain.
- Inspect the attic, basement, garage, shed, balcony, porch, yard, mailbox, and any assigned storage unit.
- Check walls and ceilings for hooks, artwork, smoke-alarm accessories, or removable equipment that belongs to you. Do not remove fixtures that transfer with the property.
- Confirm that trash, recycling, and items scheduled for pickup are handled according to the property agreement and local collection rules.
Document Condition and Meter Information
Take dated photographs or video of the empty rooms and relevant surfaces. If your utility or property handover process calls for meter readings, photograph the displayed readings and record the time. Documentation does not replace required inspection forms, notices, or handover procedures; follow the applicable lease, contract, utility instructions, or closing documents.
Close the Property Correctly
- Set thermostats, appliances, water controls, alarms, and utilities only as directed by the owner, buyer, landlord, utility, or closing instructions.
- Close and latch windows. Lock exterior doors and any required interior access points.
- Collect garage remotes, building fobs, mailbox keys, parking permits, and spare keys for the required handoff.
- Record what was returned, to whom, when, and by what method. Request a receipt when one is available.
- Do not leave until you have confirmed that the mover or rental vehicle has the correct destination and that you have the documents, keys, phone, and route information needed for travel.
Travel and Arrival at the New Home
Before unloading, make the destination safe and legible. Confirm entry instructions, open only the areas needed for the move, and walk the route from the vehicle to the rooms. Identify floor protection, tight turns, low fixtures, stairs, and doors that should remain closed.
Set Up the Receiving Plan
- Post room names that match the box labels.
- Designate a decision point where unclear items can be routed without blocking the entrance.
- Keep children, pets, medicines, valuables, and travel bags out of the unloading path.
- Choose a visible place for hardware, tools, documents, and items needing immediate attention.
- Confirm where large furniture belongs before it enters a tight hallway or staircase.
Check Items as They Arrive
Use the mover’s inventory or your own loading list to track delivery. Inspect cartons and furniture for visible loss or damage as practical, but do not hold up safe unloading to open every sealed box. Photograph concerns and follow the form’s instructions for noting exceptions. Read any delivery receipt or inventory statement before signing and keep a complete copy.
After the priority boxes reach their correct rooms, avoid opening cartons throughout the entire home. Use the unpacking checklist for the new home to restore essential rooms and routines in a practical order.
Complete the Move Day Closeout
Once unloading stops, the day is not finished until the paperwork, property, and essential living needs are under control.
- Compare the final charges with the applicable estimate, contract, rental agreement, or approved changes. Ask for an explanation of anything you do not understand before signing or paying.
- Keep the bill of lading, inventories, receipts, photographs, damage notes, truck-rental records, and contact information together.
- Check the truck, cab, loading ramp, portable container, driveway, curb, elevator, hallway, and staging area for overlooked items or debris.
- Confirm that exterior doors and windows lock, essential utilities are functioning as expected, and household members know where keys and emergency items are located.
- Set up only what is needed for the first night: medicines, charging, hygiene, basic food and water, bedding, pet supplies, and a safe path to the bathroom.
- Write down unresolved issues and the next responsible contact. Photograph damage or missing items before cleanup or repairs change the condition.
Once the delivery and immediate safety checks are complete, the household can shift from moving-day coordination to early unpacking and home setup. This guide to settling into your new home outlines the next steps for the first evening, first few days, and following weeks.
If the move is still one day away, use the day before moving checklist to finish packing, protect the no-load area, clear pathways, and prepare the morning handoff.
How a DIY Moving Day Differs
A DIY move replaces the mover handoff with vehicle, equipment, and helper coordination. Review the rental agreement, vehicle instructions, insurance choices, fuel requirements, permitted drivers, return location, and due time before leaving the pickup location. Confirm that the driver is comfortable with the vehicle’s height, length, braking distance, mirrors, and route restrictions.
Assign roles before lifting begins: driver, loading lead, door and pathway monitor, destination director, and final-walkthrough checker. Use equipment according to the manufacturer or rental provider’s instructions. Do not ask helpers to lift items they cannot control safely, and do not overload the vehicle or moving equipment.
A self-managed move requires the household to coordinate the vehicle, equipment, loading order, route, helpers, and return requirements. The complete guide to planning a DIY move covers those earlier decisions, while the checklist below focuses on carrying out the plan safely and methodically on moving day.
Common Moving Day Mistakes to Avoid
- Packing the keys, medicines, documents, chargers, or first-night bags
- Signing paperwork without reading the entries, totals, or condition notes
- Approving extra work without asking how it changes the price or schedule
- Leaving the property sweep until everyone is tired and ready to depart
- Checking only rooms while missing garages, sheds, balconies, cabinets, or appliances
- Signing a delivery document before recording visible exceptions allowed by the form
- Starting broad unpacking before doors are secured and essentials are located
Moving Day Checklist FAQs
What should stay with me instead of going on the moving truck?
Keep identification, keys, payment methods, essential documents, prescriptions, medical devices, irreplaceable valuables, phones, chargers, travel supplies, and first-night necessities with you. Also separate anything prohibited by the mover or vehicle agreement. Ask the provider for its current prohibited-items policy because lists can vary.
When should I do the final walkthrough?
Complete it after the last planned item leaves but before you surrender access. Leave enough time to inspect every storage area, document condition, follow utility or property instructions, and return keys. Your lease, closing, or handover agreement may set a specific inspection or possession time.
What moving documents should I keep accessible?
Keep the estimate, order for service, bill of lading, inventory, valuation or coverage selections, receipts, contact information, building reservations, rental agreement, and property-handover documents accessible. The exact documents differ by move type and provider.
Should I sign the inventory if I disagree with a condition note?
Ask about the entry and request a correction or clear notation before signing. Do not assume that a verbal discussion changes the written record. For an interstate professional move, consult the FMCSA consumer materials and the mover’s claims procedures if you need guidance about documentation or a later claim.
Do I need to shut off utilities before leaving?
Not automatically. Follow the utility provider’s instructions and the lease, sale, closing, or property-management requirements. In some handovers, service must remain active through a specified date or inspection. Record confirmation numbers and meter information when the provider or agreement calls for them.
What should I do first after the movers leave?
Secure the doors and windows, gather documents and keys, locate medicines and first-night supplies, verify essential utilities, photograph concerns, and write down unresolved tasks. Delay nonessential unpacking until the household can move safely through the home.
Organize the Rest of Your Move
The Complete Moving Planner Bundle brings timelines, packing plans, budget pages, mover information, and moving-day details into one coordinated planning system.
View the Complete Moving Planner BundleReferences and Resources
Editorial Note: The sources below were selected because they are primary U.S. government resources for interstate household-goods consumer protections and mail forwarding. This article provides general informational guidance. Its sequence, room-sweep method, no-load zone, receiving plan, and closeout steps are original MuvvKit organizational frameworks, not government requirements. Procedures, forms, fees, requirements, contract terms, and service details can change. Verify current information with the appropriate agency, mover, rental provider, insurer, utility, lease, contract, manufacturer, property professional, or local authority.