How to Make a Household Inventory Before a Move
Create a practical household inventory before a move with room-by-room entries, photographs, condition notes, value references, and numbered boxes.

A household inventory before a move gives you a working record of what is leaving each room, what needs special handling, and where belongings should go next. It can also reveal items that no longer need to be packed. The inventory does not have to capture every inexpensive object separately. It needs enough detail to support the decisions you expect to make.
The most useful inventory lists each item or group of items with its room, quantity, condition, estimated value, photo reference, and eventual box number. You can keep it in a spreadsheet, notebook, moving binder, or digital folder. Choose a format you can update while sorting and packing.
An inventory is one part of a broader moving plan. If you are still organizing dates, services, and responsibilities, begin with this step-by-step guide to planning a household move, then return to the room-by-room process below.
What a Household Inventory Can Do
A pre-move inventory creates a snapshot of the belongings you intend to move. That snapshot can support several practical tasks:
- estimating how much needs to be packed;
- identifying large, fragile, valuable, or unusual items;
- deciding what to keep, sell, donate, recycle, or discard;
- discussing the shipment with movers or other service providers;
- linking packed contents to numbered boxes;
- checking rooms, storage areas, and vehicles before departure; and
- comparing what left the old home with what arrived at the new one.
However, a single list does not automatically serve every formal purpose. An insurer may request particular descriptions, dates, receipts, photographs, or proof of ownership. An interstate mover must prepare its own shipment inventory before or at loading, and that document becomes part of the moving paperwork. Your personal household inventory can help you review those records, but it does not replace them.
A household inventory can support decluttering, packing, insurance records, cost estimates, and unloading decisions. See how to organize your complete household move to understand where the inventory belongs within the broader planning process.
Choose the Level of Detail Before You Start
Inventory work becomes difficult when the standard changes from room to room. Decide first what deserves an individual entry and what can be grouped.
List items individually when they are:
- furniture, appliances, electronics, artwork, instruments, or equipment;
- fragile, unusually shaped, or difficult to replace;
- identified by a model or serial number;
- likely to require disassembly, special packing, or professional handling;
- excluded or restricted by a mover, rental company, storage facility, or carrier; or
- important enough that you would want a clear record if it were missing or damaged.
Group ordinary items when separate entries would add work without helping you make a decision. For example, “12 everyday dinner plates” is usually more useful than twelve nearly identical lines. A shelf of paperback books may be recorded as a quantity or later connected to several numbered boxes.
The right level of detail depends on the household and the purpose of the record. A quick planning inventory may focus on furniture, equipment, and box counts. A more detailed property record may include brand, model, serial number, purchase information, and multiple photographs. If insurance documentation is one of your goals, ask the insurer what information it expects before assuming a particular format will be sufficient.
Set Up the Inventory Fields
The following fields form the MuvvKit household-inventory framework. It is an editorial planning structure, not an official government or insurance form.
| Field | What to record | Why it helps | Example |
| Item | A clear name for the item or group | Makes the entry recognizable | Floor lamp |
| Room | Current room or storage area | Organizes the first walkthrough | Guest room |
| Quantity | Number of matching items | Helps with grouped belongings | 2 |
| Condition | Brief factual note before packing | Records visible pre-move condition | Small scratch on base |
| Value estimate | A working estimate when useful | Flags items needing more research | Verify receipt |
| Photo reference | Filename or photo number | Connects the row to visual evidence | GR-014 |
| Box number | Assigned container number | Supports packing and arrival checks | B-032 |
You may add destination room, handling notes, dimensions, make, model, serial number, receipt location, owner, or decision status. Add fields because they will guide an action, not simply because the software allows more columns.
Avoid placing sensitive account numbers, passwords, complete identity-document numbers, or other unnecessary personal data in a general moving spreadsheet. Keep sensitive records in a more secure location and limit access to people who need it.
Prepare a Simple Recording System
Before walking through the home, create a consistent naming system. Consistency matters more than complexity.
Assign room codes
Use short, distinct labels such as KIT for kitchen, LR for living room, BR1 for the first bedroom, and GAR for garage. Include closets, attics, basements, sheds, balconies, and off-site storage because belongings in secondary spaces are easy to overlook.
Number photographs
Give each useful photograph a reference that connects it to the inventory. A file named `KIT-006-coffee-maker.jpg` is easier to match than a phone-generated filename with no room or item clue. If renaming every image would slow the project, place photographs in room folders and record the original filename.
Create box numbers
Choose a box-number pattern before packing begins. Sequential numbers such as B-001, B-002, and B-003 work across the whole home. Room-based numbers such as KIT-01 and KIT-02 make destination sorting easier. Either approach can work if each number is unique and appears both on the container and in the inventory.
Do not list valuable contents in large readable text on the outside of a box. Use the box number and destination room externally, then keep the detailed contents in your private record.
Make the Inventory Room by Room
Work through one defined area at a time. A room-by-room sequence reduces backtracking and makes it easier to identify what remains unfinished.
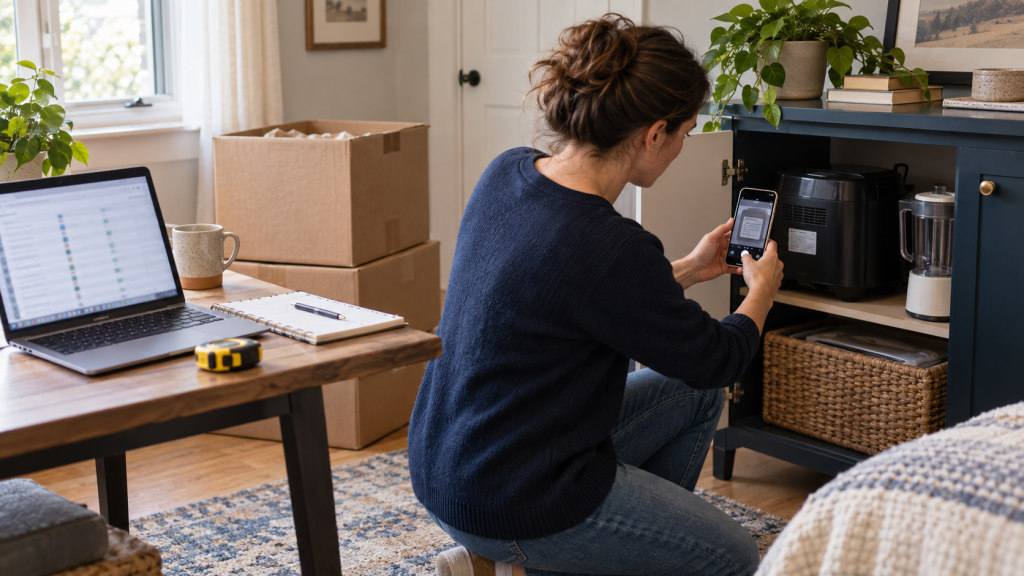
Start with a wide room view
Take one or more photographs showing the general contents and arrangement. Then scan from one side of the room to the other. Record freestanding furniture, wall-mounted items, electronics, contents of major storage pieces, and anything requiring a separate decision.
Open every cabinet, drawer, and closet. Check behind doors, under beds, above cabinets, and inside built-in storage. Include belongings stored temporarily in hallways or another room.
Record facts you can observe
Use plain descriptions. “Wood dining table with two surface scratches” is more useful than “good table.” For electronics and appliances, record the make, model, and serial number when accessible and when that detail serves a purpose. Do not move a heavy appliance or enter an unsafe position just to photograph a label.
Ready.gov advises documenting property with photographs or video and written details such as year, make, and model numbers. Insurance regulators also encourage keeping a record of possessions. These practices can strengthen the record, although each insurer controls the documentation it requires for a particular claim.
Separate decisions from records
An inventory should show what exists even when you have not decided what to do with it. Add a decision field with Keep, Sell, Donate, Recycle, Discard, or Undecided rather than deleting an entry immediately.
Once a decision becomes final, mark the date and outcome. This preserves a useful trail and prevents someone from searching for an item that was intentionally left in the household before moving day.
Close the room before moving on
At the end of each room, compare the written entries with the space. Mark the room Complete only after you have checked its storage areas and resolved unlabeled photographs. A brief final scan is faster than reconstructing missing information later.
Add Photographs Without Creating a Second Project
Photographs should clarify the inventory, not turn it into an unmanageable archive. Use a consistent minimum:
- one wide image for each room or storage area;
- one clear image of each individually listed high-interest item;
- close-ups of existing scratches, dents, chips, stains, or other condition details;
- readable model or serial-number labels when safe and relevant; and
- group images for sets or collections when the individual pieces do not need separate records.
Check each image before leaving the room. Make sure the item is visible, the photo is not blurred, and the relevant label can be read. A photo reference in the spreadsheet is useful only when the corresponding file can be located.
Video can provide a broad visual record, but it may be slower to search than labeled photographs. If you use video, move slowly, capture adequate light, and narrate only factual descriptions. Do not rely on a single long recording when individual photographs or written identifiers will be needed later.
An inventory is most useful when it stays with the other records you may need throughout the move. Keep the finished list, photographs, receipts, estimates, and identification records together by following this guide to moving documents to keep together before, during, and after a move
Estimate Value Carefully
A value column can help identify items that need special attention, but it is not automatically an appraisal, a replacement-cost calculation, or proof of what an insurer or carrier must pay.
Use a neutral status when you do not have enough information. Entries such as “receipt available,” “research needed,” “ask insurer,” or “appraisal on file” are more accurate than an unsupported number. Keep receipts, appraisals, warranties, and purchase confirmations in a linked folder when they matter.
Coverage terms differ. Homeowners, renters, storage, and moving-related protections may define covered property, exclusions, limits, valuation, and proof requirements differently. Review the actual policy or contract and ask the provider how it treats higher-value categories, sets, collections, business property, and items transported outside the home.
Connect the Inventory to Packing
The inventory becomes more useful when it continues through packing rather than ending after the walkthrough.

As each box is packed:
- assign its unique box number;
- write the destination room and box number on more than one side;
- add the number to the relevant inventory entries;
- record grouped contents in practical terms;
- flag fragile or orientation-sensitive contents in the private record and with suitable handling labels; and
- mark the box Packed only after it is closed.
If one listed group fills several boxes, use a range such as B-041 through B-043. If one box contains items from several inventory rows, repeat the same box number on each applicable row.
The inventory can also guide a room-by-room approach to packing for a move. Begin with lower-use spaces, keep daily essentials available, and update the record whenever contents move to a different container.
Ready to connect the inventory to packing?
Organize Boxes Room by Room
The MuvvKit Room-by-Room Packing System provides structured checklists and planning pages for organizing packing work, box details, and room-specific tasks.
Explore the Room-by-Room Packing System →Review a Professional Mover’s Shipment Inventory
For an interstate move, FMCSA states that the mover must prepare an inventory of the shipment before or at loading. The agency explains that the record documents the existence and condition of each item. The customer should check that every item appears, review condition notations, note disagreements, sign the pages, obtain the mover’s signature, and retain a copy.
Treat the mover’s document as a separate record from your household-planning inventory. Compare them while items are still visible. If the mover uses codes or abbreviations for condition, ask what they mean before signing. Write any disagreement in the place provided rather than relying only on a verbal conversation.
At delivery, use the mover’s inventory according to the mover’s check-off process and keep your own list available for comparison. Do not discard the bill of lading, inventory pages, estimates, orders for service, receipts, photographs, or correspondence while charges or claims remain unresolved.
Federal interstate rules do not govern every local or intrastate move in the same way. State rules and individual contracts may differ. Verify the requirements that apply to the actual move.
Store the Inventory Where You Can Reach It
Keeping the only copy inside a packed computer or box defeats much of the record’s purpose. Maintain an accessible working copy during the move and a backup in a separate location.
A practical file structure might include:
- the master inventory;
- room folders for photographs;
- receipts and purchase records;
- appraisals or specialist documentation;
- mover estimates and service orders;
- the mover’s signed shipment inventory;
- the bill of lading and delivery paperwork; and
- notes about missing items, damage, or follow-up actions.
Choose storage that fits the sensitivity of the information. Protect devices and accounts with appropriate access controls, and avoid broadly sharing a detailed list of valuables. If another household member needs editing access, define who will update the master copy so competing versions do not develop.
Check the Inventory at Key Moving Stages
The following review points are a MuvvKit planning method, not an official schedule:
After the first walkthrough
Confirm that every room and storage area appears in the file. Resolve missing photo references and research only the items that need more detail.
After decluttering decisions
Mark items that left the household and retain useful donation, sale, disposal, or recycling records separately. Recalculate quantities when grouped belongings changed.
As boxes are sealed
Add box numbers, destination rooms, and status. Investigate any entry marked Keep that cannot be located.
Before the moving vehicle leaves
Check the home, garage, outdoor areas, storage spaces, and vehicles. For a professional move, compare your records with the mover’s paperwork and retain signed copies.
At delivery and during unpacking
Use box numbers to track what arrives. Note visible damage or missing items promptly and follow the mover’s, insurer’s, or other provider’s stated procedures and deadlines. Do not delay a required notice while trying to make the private inventory perfect.
Common Inventory Mistakes
Avoiding a few predictable problems makes the record more reliable.
- Starting with too much detail: Record decision-useful information first. Expand selected entries later.
- Skipping storage spaces: Include closets, attics, sheds, garages, rented units, and belongings kept with relatives.
- Using vague descriptions: Add identifying details that distinguish similar items.
- Leaving photographs unlinked: Use filenames, folders, or reference numbers that connect images to entries.
- Guessing values: Mark uncertain figures for verification instead of presenting them as established amounts.
- Reusing box numbers: Give every container a unique identifier.
- Keeping one inaccessible copy: Maintain a reachable working copy and a separate backup.
- Treating the list as a formal guarantee: Check the documentation rules in the relevant policy, contract, or regulation.
- Signing a mover’s inventory without review: Check item and condition entries, record disagreements, and keep a copy.
Frequently Asked Questions
Do I need to list every item I own?
No universal planning rule requires every ordinary item to have a separate line. List important, identifiable, fragile, or decision-relevant belongings individually, and group routine items when that remains useful. An insurer, mover, storage provider, or other party may have separate documentation requirements.
Should I make the inventory before or after decluttering?
Begin with a broad record before major decisions if you need a clear picture of what the household owns. Then add a decision status and update the list as items are sold, donated, recycled, or discarded. If time is limited, inventory important items first and combine the inventory with the decluttering pass.
Is a video walkthrough enough?
A video can support a broad visual record, but it may not show model numbers, serial numbers, condition details, or individual box locations clearly. Written entries and labeled photographs are easier to search. Ask the relevant insurer or provider what documentation it expects.
Is my household inventory the same as the mover’s inventory?
No. Your household inventory is a private planning and documentation record. For an interstate shipment, the mover prepares a shipment inventory that records the items and their condition and attaches it to the bill of lading. Review that document carefully and keep a signed copy.
Where should I keep receipts and appraisals?
Store them in a protected folder linked to the relevant inventory entry. Keep a backup separate from the packed household, and limit access when the files contain personal or financial information.
What should I do if something is missing or damaged?
Document what you observe, preserve photographs and paperwork, and follow the notice and claim instructions in the applicable contract or policy. Procedures and deadlines vary, so verify them directly with the mover, insurer, storage provider, rental company, or other responsible party.
Finish With a Record You Can Actually Use
The best household inventory before a move is not necessarily the longest one. It is the record you can update while packing, understand at delivery, and retrieve when a question arises.
Start room by room, use consistent names, connect photographs to written entries, and add box numbers as packing progresses. Keep personal planning records separate from mover paperwork and formal insurance documentation. Finally, store the inventory somewhere accessible and protected so it can support the move from the first walkthrough through the last unpacked box.
Want one place for the wider moving plan?
Keep Belongings, Packing, and Moving Details Together
The MuvvKit Complete Moving Planner Bundle brings together household planning, belongings, packing, timelines, budgets, moving-method decisions, and moving-day details.
Explore the Complete Moving Planner →Use the free MuvvKit guides independently or pair them with the planner when you want a structured place to organize the move.
References and Resources
Editorial Note: The sources below were selected because they provide current guidance from federal emergency-preparedness and transportation agencies and state or national insurance regulators. This article offers general informational guidance, not legal, insurance, tax, appraisal, or claims advice. The suggested inventory fields, room codes, photograph references, box-number systems, and stage-based review sequence are original MuvvKit editorial planning frameworks, not official requirements. Procedures, forms, coverage terms, proof standards, fees, claim deadlines, and service details can change. Readers should verify current requirements with the applicable agency, mover, insurer, storage provider, contract, lease, manufacturer, or local authority.
- Federal Motor Carrier Safety Administration: Pickup of My Shipment of Household Goods
- Ready.gov: Document and Insure Your Property
- Ready.gov: Financial Preparedness
- National Association of Insurance Commissioners: Moving Places, Changing Spaces
- California Department of Insurance: Home Inventory Guide