How to Label Moving Boxes for Faster Unpacking
Use a four-part moving-box label to give every carton a destination, unique box number, unpacking priority, and short contents cue without displaying sensitive details.

The simplest way to label moving boxes for faster unpacking is to give every carton four pieces of information: its destination room, a unique box number, an unpacking priority, and a short contents cue. Put the information on the top and at least one side, then record the same box number in a separate inventory. This gives the unloading crew a visible destination and gives the household a way to find specific belongings without opening every carton.
The method works best when it is established before the first box is sealed. If packing is still being organized, start with How to Pack for a Move: A Room-by-Room Household Packing Guide and use one labeling pattern across every room.
The Four-Part Box Label
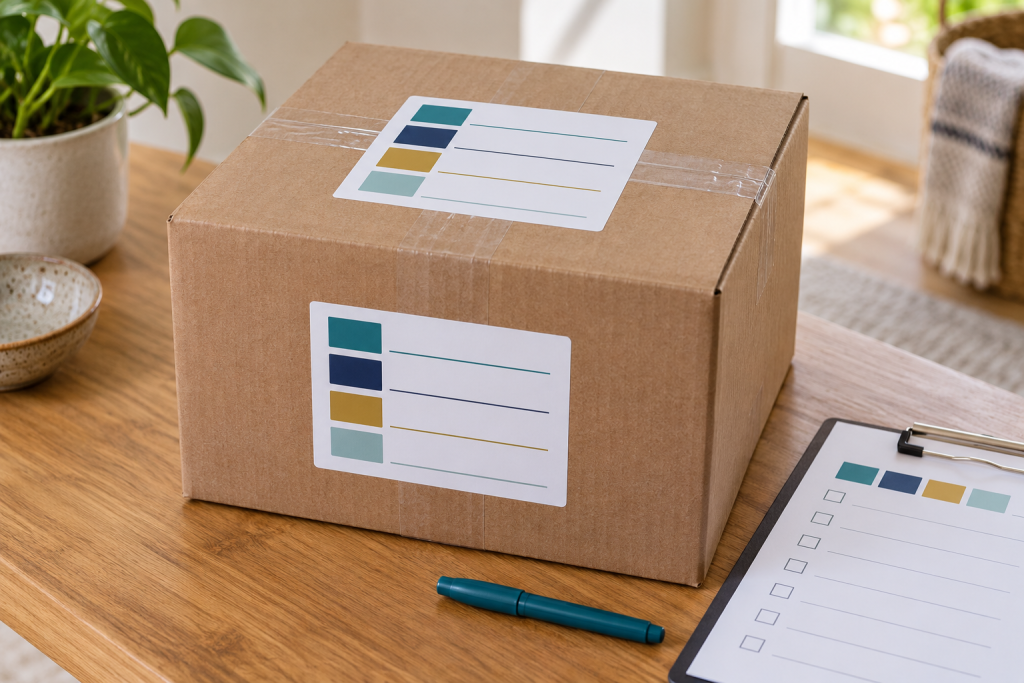
A label should support unloading and unpacking without becoming a detailed public list of the household’s property. MuvvKit’s four-part label uses only the information needed at the carton:
- Destination: the room or defined zone where the box should be placed.
- Box ID: a unique code that also appears in the household inventory.
- Priority: a simple unpacking level such as Open First, Early, or Later.
- Contents cue: a brief, non-sensitive description that helps identify the carton.
A kitchen carton might read “KITCHEN | K-07 | EARLY | baking tools.” A bedroom box could read “BEDROOM 2 | B2-04 | LATER | off-season linens.” The exact abbreviations matter less than using them consistently. Avoid changing formats halfway through the move unless the existing system cannot distinguish the boxes.
Priority labels are most useful when they support a clear opening sequence at the destination. Review what to unpack first after moving before assigning open-first markings to bedroom, bathroom, kitchen, child, pet, work, and school boxes.
Choose Destination Names Before Packing
Room names fail when the old and new homes use different layouts. “Guest room” may be clear at origin but ambiguous at the destination. Before labeling begins, choose names that match the new home or create numbered zones on a simple floor plan.
Use distinct destinations such as Primary Bedroom, Bedroom 2, Hall Closet, Kitchen, Garage North Wall, or Storage Zone A. Post the same names at the destination doors or zones on unloading day. A mover or helper should not need to interpret family nicknames while carrying a box.
When the order of rooms is still being decided, The Best Room-by-Room Order for Packing a Home can help establish a consistent room list before cartons begin to accumulate.
Assign a Unique Box Number
Give each carton one identifier that is not reused. A room prefix followed by a sequence is easy to extend: K-01, K-02, LR-01, LR-02, and so on. For similar room names, use codes that cannot be confused at a glance. Primary Bedroom and Bedroom 1 should not both become B1.
Write the number on the carton and enter it in the separate inventory as soon as the box is closed. The inventory can hold more detail than the exterior label: a fuller contents summary, the pack date, fragile items, the person who packed it, or a note that something is missing. Store the inventory where it will remain accessible during transit.
Do not renumber completed cartons simply to remove gaps. A missing sequence number is less disruptive than changing codes already written on boxes and recorded in notes or photographs.
Set an Unpacking Priority
Priority tells the household when a carton is likely to be useful; it does not describe how carefully it should be carried. Keep unpacking priority separate from handling information.
Open First
Reserve Open First for a small number of boxes needed soon after arrival. Examples may include basic kitchen setup, bedding, shower supplies, immediate work equipment, or child-care items. Belongings traveling in the household’s personal essentials bag should not be placed in these boxes merely because they are important.
Early
Use Early for cartons needed during the first several unpacking sessions but not immediately at the door. Everyday cookware, frequently worn clothing, desk supplies, and routine bathroom stock may fall here, depending on the household.
Later
Use Later for seasonal, decorative, archival, or occasional-use belongings. These boxes can move to the edge of the room while furniture placement and essential setup are completed.
Keep the number of priority levels small enough to recognize quickly. A complex ranking system can create more decisions than it resolves. If a carton contains mixed priorities, label it according to the item most likely to determine when the box must be opened.
Add a Short Contents Cue
Use a few words that distinguish the box from others going to the same room. “Kitchen items” adds little information when every carton in the group says Kitchen. “Baking tools,” “daily dishes,” or “pantry containers” is more useful without listing every object.
Keep expensive, private, regulated, or identity-related contents off the exterior. Use broad cues such as “office files,” “personal items,” or “electronics accessories,” and place the useful detail in the separate inventory. Important documents, keys, medicine, payment methods, and irreplaceable valuables generally belong in a controlled carry-with-you group rather than the household shipment.
Place Labels Where They Stay Visible
Write or attach the complete label on the top and one side of the carton. The top helps while boxes sit individually; the side remains visible after stacking. If the cartons may be approached from several directions, repeat the destination and box ID on a second side.
Place labels on a clean, dry surface where tape seams, straps, and closures will not cover them. Test adhesive labels on the actual carton before committing to the system. A loose paper note tucked beneath clear tape can work only if it remains flat, readable, and securely enclosed without weakening the closure.
Do not write across the carton seam because opening the box can divide or destroy the identifier. Keep labels away from corners that may abrade and from areas likely to receive additional handling tape.
Once the labeling system is established, use the day before moving checklist to close the last cartons without reopening finished boxes or packing essential items by mistake.
Use Color as a Secondary Cue
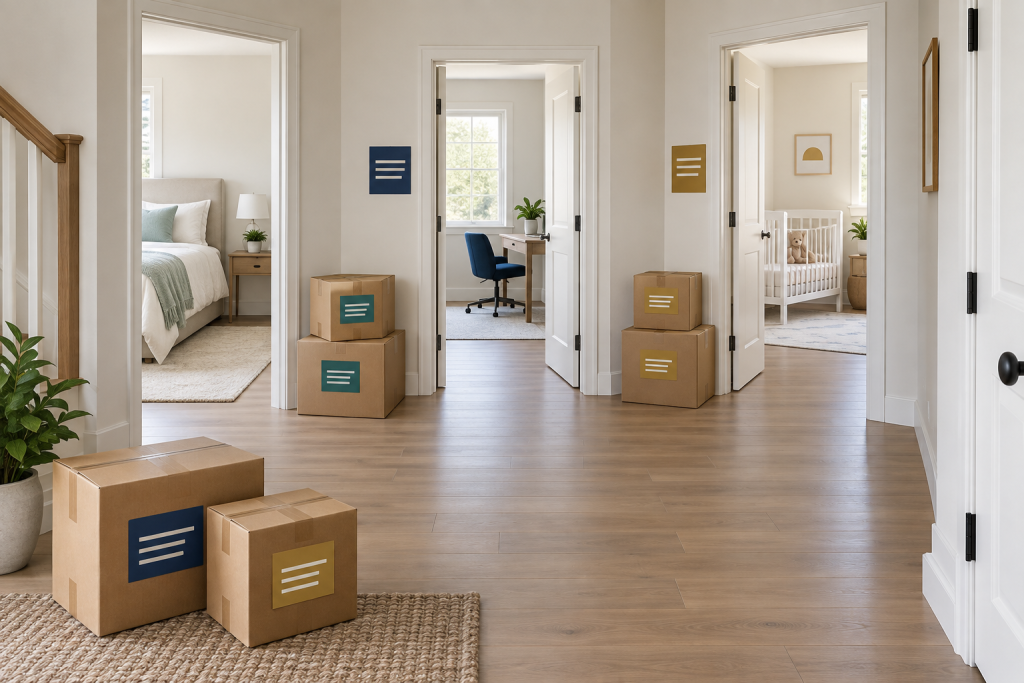
Color can help people recognize destinations quickly, but it should repeat information rather than replace it. A teal mark might support Kitchen and a gold mark might support Primary Bedroom, while the written destination remains visible for anyone who cannot distinguish the colors or does not know the code.
Use a limited palette with clear contrast. Apply the same color in the same location on every carton and place a matching sign at the destination room. Avoid relying on subtle shades that may look alike in dim light, and do not allow decorative tape to substitute for proper carton sealing.
During the final week before moving day, review finished cartons for readable room names, handling notes, and unpacking priorities before the remaining supplies are packed.
Add Handling Notes Only When They Are Specific
A handling note should describe a real instruction that can be followed: This Side Up, Do Not Stack, Keep Dry, or Heavy. Mark more than one visible face when orientation matters. Do not use Fragile as a substitute for adequate packing, suitable cushioning, or a conversation with the mover about unusually delicate property.
If a professional mover is involved, ask how customer-packed boxes should be marked and whether the company applies its own inventory stickers or handling codes. Keep the household’s box ID visible, but do not cover, alter, or imitate carrier-applied identifiers.
Build the Label and Inventory at the Same Time
The simplest way to keep labels accurate is to complete the carton before moving to the next one:
- Choose the destination room before items enter the box.
- Pack compatible belongings and keep the weight manageable for the intended handler.
- Add any object-specific protection and close the carton securely.
- Assign the next unused box ID for that destination.
- Write the destination, box ID, priority, and contents cue on the top and side.
- Record the box ID and fuller contents in the separate inventory.
- Move the finished carton to the correct staging zone.
Gather labels, markers, tape, and inventory materials at one station. The Moving Packing Supplies Checklist explains how to prepare that core supply group without purchasing materials that do not have a defined job.
Keep Every Room and Box Organized
The MuvvKit Room-by-Room Packing System provides worksheets for planning packing tasks, box contents, labels, and room progress.
View the Room-by-Room Packing SystemCoordinate Labels with Professional Movers
A private box-labeling system and a mover’s shipment inventory serve related but different purposes. For an interstate household-goods move, the Federal Motor Carrier Safety Administration states that the mover must prepare a shipment inventory before or at loading. The customer should review the listed items and condition entries, note disagreements, sign the pages, and retain a copy.
Use the household box IDs to support your own unpacking and cross-reference process, but follow the carrier’s paperwork and written instructions. Consult the FMCSA guidance on pickup and shipment inventories for the federal requirements that apply to interstate household-goods movers. Local, intrastate, storage-container, and self-move arrangements may use different procedures.
Prepare the New Home for the Label System
Before unloading, place a readable destination sign at each room or zone using the same wording and colors as the box labels. Give helpers a one-page destination key or floor plan. Keep signs away from surfaces where tape could damage paint or finishes.
Create one landing area for cartons that are unclear, damaged, or assigned to a blocked room. This prevents a single uncertain label from stopping the unloading flow. Resolve those boxes from the inventory after paths are clear rather than opening them in a doorway.
Within each room, group Open First boxes where they remain reachable. Put Later cartons along a safe wall without blocking vents, doors, furniture assembly, or walking paths. The label system speeds unpacking only when the physical placement preserves access.
Common Labeling Mistakes
- Writing only the old room name when the destination layout has changed.
- Using vague descriptions such as Miscellaneous on many boxes.
- Listing valuable or private contents on the exterior.
- Placing the only label on top, where another carton hides it.
- Using color without written room names or a posted destination key.
- Reusing a box number or forgetting to enter it in the inventory.
- Covering labels with sealing tape, carrier stickers, or stretch film.
- Marking too many cartons Open First until the priority loses meaning.
- Treating a Fragile label as the box’s only protective measure.
Correct errors with one clean replacement label rather than several crossed-out versions. Update the inventory at the same time so the carton and record continue to match.
Frequently Asked Questions
What information should go on a moving box label?
Include the destination room or zone, a unique box ID, an unpacking priority, and a short non-sensitive contents cue. Add a specific handling instruction only when it is accurate and necessary.
Should I write the contents on every moving box?
Use a brief exterior cue rather than a complete list. Store detailed contents in a separate inventory linked by the box ID, especially for private or valuable property.
Where should labels go on moving boxes?
Place the full label on the top and at least one side. Keep it away from seams, closures, corners, straps, and areas likely to receive additional tape or carrier labels.
Is color coding moving boxes enough?
No. Color is most useful as a secondary cue. Repeat the destination in readable words and use the same room name on signs at the new home.
How should I label boxes that need to be unpacked first?
Use one consistent priority term such as Open First and limit it to cartons needed during initial setup. Keep travel documents, keys, medication, valuables, chargers, and immediate personal necessities in a separate carry-with-you group.
Do professional movers use my box numbers?
Not necessarily. Movers may apply their own inventory numbers, stickers, or codes. Ask the company how customer labels should be placed and keep both systems visible without covering or altering the mover’s identifiers.
Final Takeaway
A useful moving-box label is short, repeatable, and connected to a separate inventory. Put the destination, unique box ID, unpacking priority, and a brief contents cue on the top and side of every finished carton.
Prepare matching destination signs at the new home and keep Open First boxes accessible. The result is a traceable flow from packing zone to unloading room to unpacking sequence, without advertising a detailed list of the household’s belongings.
Organize the Rest of Your Move
Explore MuvvKit planners and checklists for packing, scheduling, budgeting, moving day, and settling into your new home.
Explore MuvvKit Moving ToolsReferences and Resources
Editorial Note: The federal source below addresses inventories for interstate household-goods shipments. This article provides general informational guidance. MuvvKit developed the four-part label, destination-key method, priority levels, box-number format, and label-and-inventory workflow as practical editorial tools; they are not federal requirements. Mover procedures, carrier labels, prohibited items, storage rules, contracts, and local requirements can change. Confirm current instructions with the relevant mover, provider, contract, and public authority.
Federal Motor Carrier Safety Administration – Pickup of My Shipment of Household Goods. Official guidance concerning orders for service, shipment inventories, bills of lading, and related interstate moving procedures.